Local Development
Introduction
Developing your dApps or smart contracts requires some tinkering to get a proper setup that is both a good simulation of how Mainnet will behave, but also customizable enough to suit the needs of a development environment.
One very common approach is to create your own custom chain offline and develop on top of it. The issue with this approach is that if you are integrating with protocols like Uniswap or others that are on Mainnet, it's difficult to simulate on your local chain as the smart contracts from Mainnet are not there.
Another approach is to use a testnet like Ethereum Goerli. While most protocols (including Uniswap) have versions of their smart contracts deployed on common testnets, there are certain behavioural differences. Not all pools that are on Mainnet are on Goerli for example. Also, it's difficult to get enough testnet ETH to account for real testing. And without lots of testnet ETH it's even more difficult to swap to other coins on Uniswap, if that's what you need to do in your development environment.
This guide focuses on yet another approach to local development: Mainnet Forks.
A Mainnet Fork is a local chain that copies the state of Ethereum Mainnet at a given block number. It then gives you access to cheat codes like wallets with thousands of ETH and RPC URLs that you can use as drop-in replacements of real Mainnet RPCs.
This approach combines the best of all other approaches. You have a local chain that you can manipulate to your liking and you have real deployments of all the protocols you need to test and develop your dApp or smart contracts.
info
This guide focuses on Ethereum Mainnet. But you can easily fork any other chain by simply replacing the RPC URL with one of the network you want to use.
For this guide, the following packages are used:
Please note that we use ethers version 5, as this is still the most commonly used version of ethers.js. If you use version 6, you will need to slightly change the syntax in the examples below.
info
Forking a chain requires archival data and trace calls. Infura and normal geth instances are by default not archival. You can get a free archival RPC that you can use to follow this guide and fork Mainnet you can visit Chainnodes.
Using Foundry and Anvil
There are several developer tools to fork Mainnet. Anvil by foundry is a newcomer that's fast and easy to setup. This guide focuses on Anvil.
As a first step, follow the installation guide in the foundry book.
Once you have done that, you will be able to fork Mainnet straight away. Run the below command in your terminal:
Make sure that you:
- Replace your API Key (get one by heading to Chainnodes)
- Replace the block number with a recent one, check Etherscan for that
- If you fork a non-Ethereum Mainnet chain, check Chainlist for the correct chain id and replace both occurrences in the command below
anvil --fork-url https://mainnet.chainnodes.org/api_key --fork-block-number 17480237 --fork-chain-id 1 --chain-id 1
Run anvil --help to see all available options.
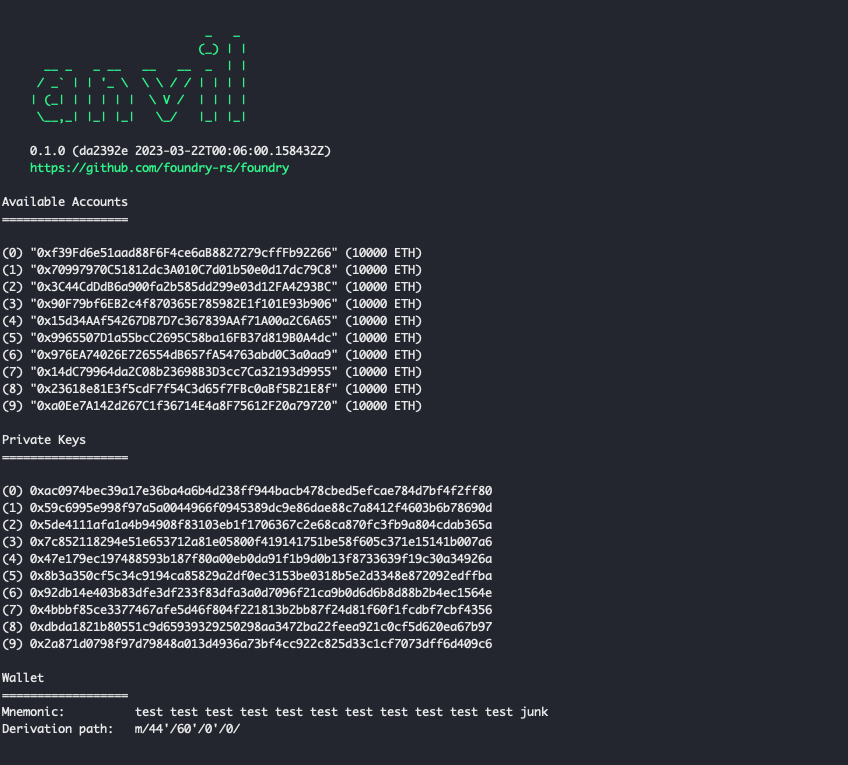
Once you have done that, you should see something like the below:

Your local fork of Mainnet is now running!
And as you can see on the screenshot above, anvil prints a bunch of private keys that are loaded with 10k ETH each. We will use them going forward to send transactions, including swaps on Uniswap pools.
warning
Security consideration: This is a fork of Mainnet and the same chain id is used. You have no replay protection to Ethereum Mainnet. So you need to 1: Never use the anvil private keys on a real chain or send funds to it (they are leaked everywhere) and 2: Not send any transactions to your local fork chain with accounts that you use on Ethereum Mainnet or other real chains.
If you scroll down in your terminal, near the bottom of the anvil logs you will find your RPC URL.
If you haven't changed any configs, it should be 127.0.0.1:8545.
This is the RPC URL that you can now use as a drop-in replacement everywhere in your development environment, and interact with it
as if it was real Ethereum Mainnet. You can use the http provider http://127.0.0.1:8545 as well as the Websocket provider ws://127.0.0.1:8545.
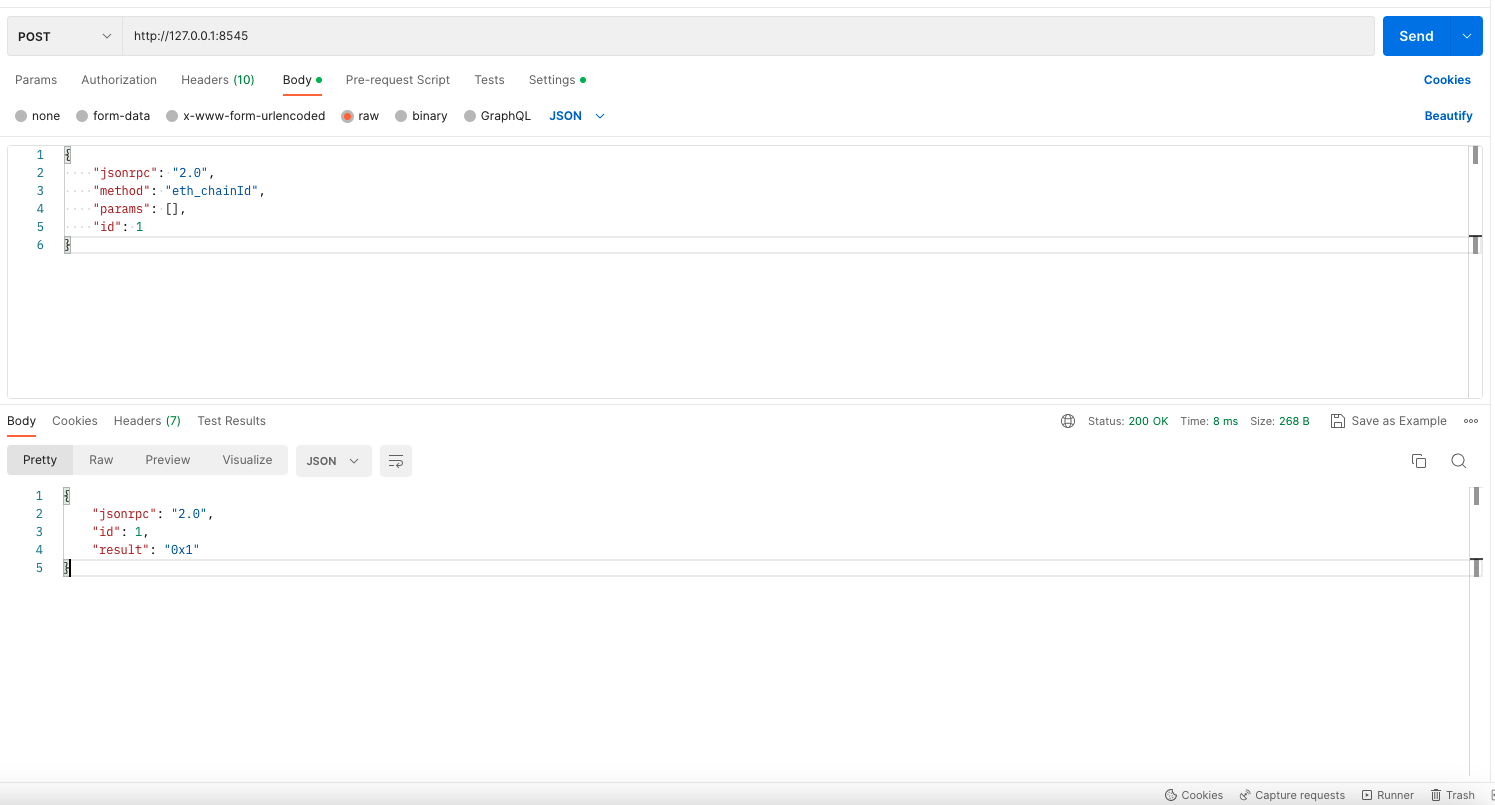
You can now make a sample RPC request to your http provider using Postman using the below:
POST http://127.0.0.1:8545
Body:
{
    "jsonrpc": "2.0",
    "method": "eth_chainId",
    "params": [],
    "id": 1
}
The result should look like the below (see image below as well):
{
    "jsonrpc": "2.0",
    "id": 1,
    "result": "0x1"
}

As you can see, the chain id is 1, just like on Mainnet!
You can find the above example and more in this Postman workspace under "Local Development".
Using your Mainnet Fork
Now that you have a running Mainnet Fork, you will be able to use it everywhere in your development setup. Using one of the private keys provided by anvil, you have access to enough ETH to do endless swaps and smart contract calls.
If you need any other token, you now have the flexibility of swapping your ETH to any token that has a pool deployed on Mainnet. You basically take your fake ETH and swap it to the token you need.
Check out one of the guides about swapping and replace the RPC URL with your local anvil HTTP link as above.
Next Steps
Using the above you are fully equipped to continue following the guides about how to use Uniswap while testing everything locally before going on Mainnet. You will also be able to reuse what you have learned when you develop your own protocols or dApps.
You can also continue tapping into other developer tools that make smart contract development easier like forge from foundry. To read more about foundry and their developer tooling, visit their Github or the foundry book.